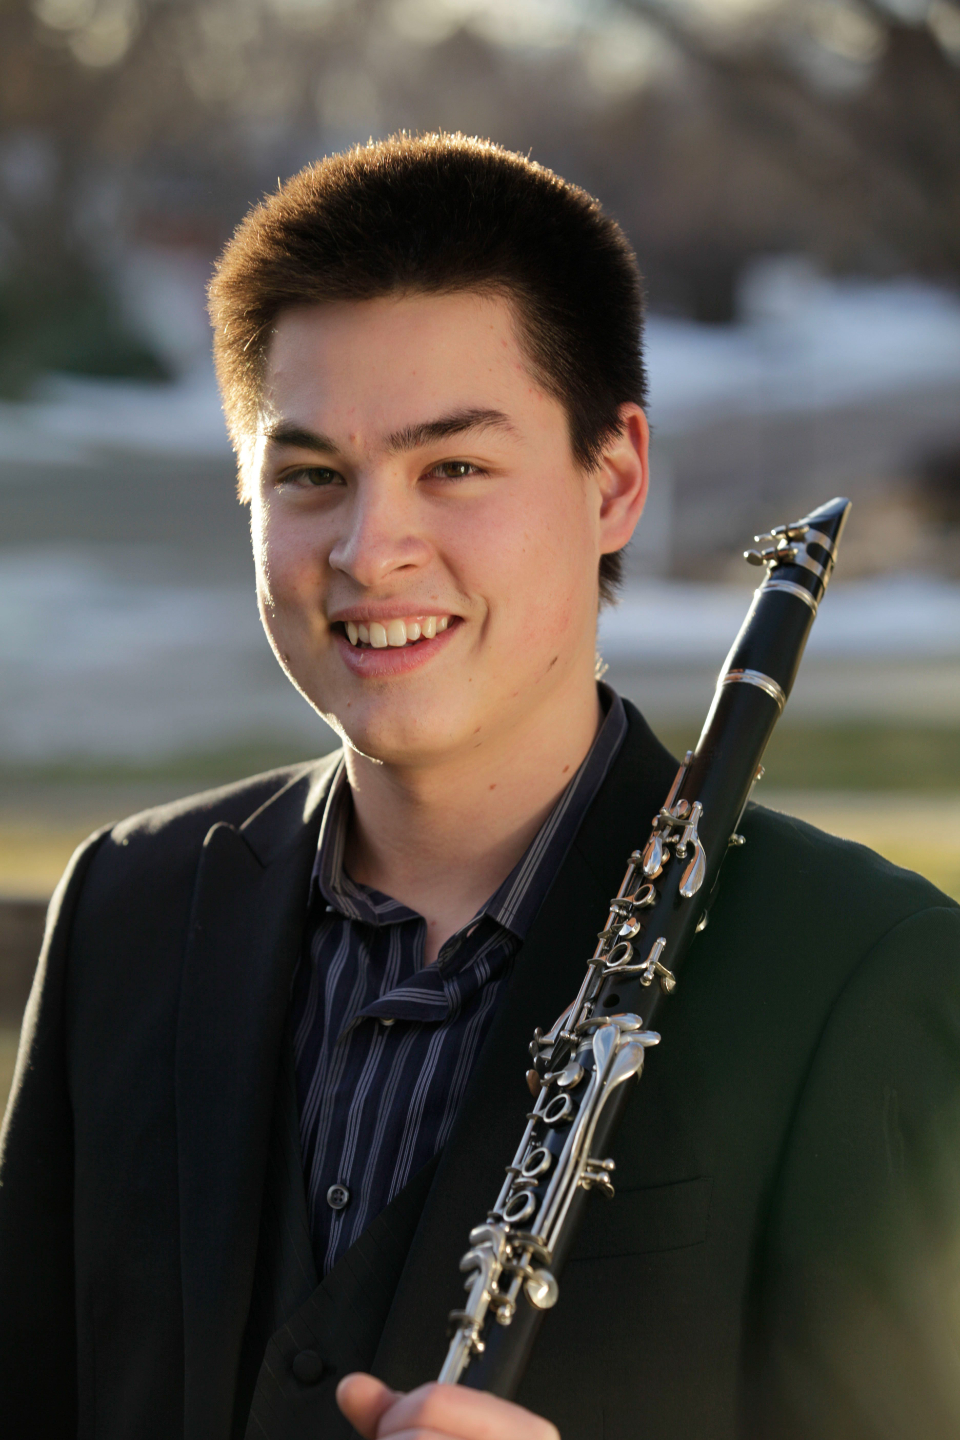
How to Play Clarinet: Starting the Journey Right!
By Josh Goo | QuickStart Clarinet
So you want to know how to play the clarinet. Maybe you just got your first instrument and have no idea where to start. Maybe you have some experience and want to make sure you are building on a solid foundation. Either way, you are in exactly the right place.
I am going to take you through everything you need to go from knowing literally nothing about the clarinet to playing your first melody and understanding the fundamentals that will make you a great player over time. This is not a shortcuts guide. This is the real thing. The foundation that professionals still come back to, every single time they practice.
My name is Josh Goo and I have spent years learning, performing, and teaching clarinet. My whole mission at QuickStart Clarinet is to cut through the confusion and help you build a real foundation so that playing music is fun, not frustrating. Let's get into it!
If you would like a video version of this material click here.
Table of Contents
- The Equipment You Need to Get Started
- How to Assemble the Clarinet
- How to Put the Reed On
- The How to Play Clarinet Triangle: Air, Tongue, Embouchure
- How to Make Your First Sound
- Hand Position and Holding the Clarinet
- How to Read Music: Rhythm, Notes, and Style
- Playing Your First Song
- The Three-Step Warm-Up: The Secret to Long-Term Progress
- Squeaking, High Notes, and Common Problems
- Year by Year: What to Focus On as You Grow
- Free Resources to Continue Your Clarinet Journey
1. The Equipment You Need to Get Started
Before you can play a single note, you need the right gear. Here is exactly what you need and what to look for.
The Clarinet
For anyone just starting out, I highly recommend a student model Bb (B-flat) clarinet. These are usually made of ABS plastic resin, which is great for beginners. Plastic is more durable, handles humidity changes better, and costs less than wood. Save the wood clarinet for later.
For brands, stick with names that have a solid reputation for student instruments. Yamaha student model clarinets are the gold standard. Buffet, Jupiter, and Selmer are also widely trusted. But, my personal recommendation for a great student clarinet is the Backun Alpha.
If budget is a real concern, renting from a music store is a smart option, especially at the beginning. Many stores have rent-to-own programs where your payments apply toward a purchase. If you do buy used, I strongly recommend taking the instrument to a local repair person to make sure everything is in good shape.
Reeds
The clarinet makes sound through a thin piece of cane called a reed. As a beginner, start on a size 2 or 2.5 reed. D'Addario Reserve reeds or Vandoren are great, but Juno reeds are a really solid option for getting started at a slightly lower price point.
Over time, you will work your way up to harder reeds. A size 3 to 3.5 is usually where most players land after a year or two of consistent playing. Move up gradually, and go with what feels good rather than rushing to a harder strength.
One important thing to know: not all reeds in a box are the same, even if they are the same strength. Each reed vibrates a little differently. This is why rotating through multiple reeds is so important, and we will talk more about that later.
The Mouthpiece
Most clarinets come with a mouthpiece. If yours has no markings on it and you cannot identify what it is, it is probably not great and worth upgrading. Good student mouthpieces that I recommend are the Fobes Debut, the Premiere by Hite, and the Yamaha 4C. All of these run around $30 and are a significant upgrade from a stock no-name mouthpiece. The Backun Protege is also excellent and comes with the Backun Alpha clarinet.
The Ligature
The ligature is the metal, plastic, or leather clamp that holds the reed to the mouthpiece. Most clarinets come with one. You do not need anything fancy to get started. When tightening the ligature, tighten the screws just enough that the reed is not freely wiggling around. Do not crank it down tight, as that can choke the sound.
The Other Essentials
- Cork grease: This goes on the joints of the clarinet so they assemble smoothly. It looks like a tube of ChapStick. Apply a small amount and rub it in with your fingers. Less is more. Too much cork grease can actually degrade the corks over time.
- Swab: After every single time you play, pull a swab through the clarinet body and mouthpiece separately to remove moisture. Microfiber swabs are best. Never swab the mouthpiece while it is still attached to the instrument, as a swab hitting the mouthpiece can cause damage.
- Music stand: A simple folding stand is inexpensive and makes a real difference.
- Metronome and tuner: One of the most powerful practice tools you have. A free phone app works perfectly, but if you want to spend a few dollars the TonalEnergy Tuner & Metronome app is 110% worth it!
2. How to Assemble the Clarinet
Your clarinet comes in five main parts: the bell, the lower joint, the upper joint, the barrel, and the mouthpiece. There is also the ligature and the reed. Here is how to put it all together safely.
Before you start assembling, put a small amount of cork grease on each cork and rub it in with your fingers. This makes everything go together more smoothly and protects the corks. And as I mentioned above, less is more with cork grease.
A couple of important rules before you touch a key: always hold each joint by the body, not by the keys, and use a gentle twisting motion as you push the joints together rather than forcing them straight on. Twisting makes it much easier.
Step-by-Step Assembly
- Start with the mouthpiece and barrel. Twist the mouthpiece into the correct end of the barrel. One end fits snugly and one does not. Go with the snug one.
- Attach the barrel to the upper joint. Twist gently as you push.
- Connect the upper joint to the lower joint. This is the trickiest step because of the bridge key. The bridge key is a small key that connects the two joints and links a key on the upper joint to a key on the lower joint. Before connecting, press down the ring key on your left hand so that the upper joint bridge key lifts up and out of the way. Do not press the right hand keys, as that would also lift the lower joint bridge key, and then they will collide and bend. Left hand down, right hand free, then twist the joints together carefully. Line up the posts on each joint to make sure the bridge keys are properly aligned.
- Attach the bell to the bottom of the lower joint. This one is easy. Just twist it on.
A quick tip to verify the bridge key is aligned correctly: press down the right hand keys and check that the corresponding key on the left hand side also moves. If the left hand keys wiggle and the pad below the left index finger doesn't fully seal, the joints can be rotated slightly until the left hand pad fully seals by just pressing the right hand keys.
3. How to Put the Reed On
The reed is the most important part of the clarinet for actually making sound. Here is how to handle it correctly.
First, wet the reed. Take it out of its case and put it in your mouth, wetting the tip first and then the other end as well. You want the whole reed slightly damp, not soaking wet. I usually put my reed in my mouth while I am assembling the rest of the clarinet so it is ready to go by the time I need it.
Be extremely careful with the tip of the reed. It is very thin and very fragile. Never bump it against anything, and do not let the ligature clip it when you are putting things together.
Placing the Reed on the Mouthpiece
I like to take the ligature completely off the mouthpiece first, place the flat side of the reed against the flat side of the mouthpiece, and then carefully slide the ligature back over the top. Some players leave the ligature on and slide the reed underneath it. Either approach works. Do what feels easier and safer to you.
When it comes to how high or low to position the reed on the mouthpiece, there is no single perfect spot. In general, you want the tip of the reed to roughly line up with the tip of the mouthpiece. Moving the reed slightly higher makes it feel a little firmer. Moving it slightly lower makes it feel a little lighter. Experiment and find what works best for you on a given day with a given reed.
Tighten the ligature screws just enough that the reed is not wiggling around. That is all it needs. When you are looking at the reed, the screws of the ligature should be on the right side. You should be able to tighten them with your right hand.
4. The How to Play Clarinet Triangle: Air, Tongue, Embouchure
Before we talk about actually making a sound, I want to give you the framework that organizes everything. I call it the How to Play Clarinet Triangle. It has three corners: air, tongue position, and embouchure. All three work together to create the sound. If any one of them is off, the sound suffers.
Corner #1: Air (The Most Important)
The air is the fuel. The clarinet makes sound because air from your lungs vibrates the reed, and that vibration resonates through the instrument. The air is the single most important variable in your playing. If you have any sound quality issues, air is always the first place to look.
What you want is fast, narrow, focused air. Not a big wide puff of air, but a steady, energized stream. Think about blowing through a narrow straw or aiming at a bullseye straight in front of your face. You want that whistly, almost hissing quality to the air.
The most common mistake when someone says 'use more air' is to just blow harder. That actually creates a big, wide, spread, and kind of honky sound. It also runs out fast. What you really want is more speed and focus to the air, not just more force. You can practice this away from the clarinet by trying to make a whistling sound with just your breath, not using your lips. The more focused and fast the air stream the easier things will be when you pick up the clarinet.
Corner #2: Tongue Position
The tongue has two jobs on the clarinet. One is shaping the air. The other is articulation, which we will get to in a moment.
For shaping the air, think about what happens inside your mouth as you make an E vowel. The back of the tongue is high. The middle of the tongue shifts forward. This is approximately the tongue position you want when playing. It helps focus and direct the air in the way we talked about above.
A good exercise is to use a coffee stirrer straw. Blow through it and listen to the sound you get. That slightly whistly, fast, focused stream is what you are going for inside the clarinet. Practice matching that sound with and without the straw until it starts to feel natural.
Corner #3: Embouchure
Embouchure (pronounced AHM-buh-shure) is the French word for how you shape your mouth around the mouthpiece. The whole role of the embouchure is to enable and encourage reed vibrations. You want to facilitate maximum reed vibration without either dampening it (too squishy) or pinching it off (too tight).
My favorite exercise to find the right embouchure shape is the finger straw exercise. Take your finger, put your top teeth on your fingernail, and suck through your finger as if you are trying to drink a thick milkshake. Notice what your face does: chin points down and flattens, corners of the mouth draw in, top lip comes down. That shape is exactly what you want to bring to the mouthpiece.
When you put the clarinet in your mouth, your top teeth anchor on the mouthpiece. Your bottom lip flattens against your bottom teeth, creating a firm surface for the reed to vibrate against. The corners of your mouth squeeze in to create a seal. The chin stays flat and pointed down. Think of it as having firm corners without the jaw biting up and into the reed.
Two things to avoid: a squishy bottom lip that dampens the reed vibrations, and a biting jaw that pinches the reed vibrations off. Both kill the sound. The solution is a firm to the touch bottom lip combined with corner pressure, not jaw pressure.
5. How to Make Your First Sound
Before you put the whole clarinet together and try to play, start with just the mouthpiece and barrel. This is how I recommend every beginner start. It removes all the other variables and lets you focus entirely on your air and embouchure.
The Sound Preparation Process
This will help you start every note cleanly and confidently.
- Breathe in through the corners of your mouth with your embouchure mostly set.
- Set your embouchure fully as you finish the breath.
- Place the tip of your tongue gently on the tip of the reed.
- Start blowing. Air is moving, but the tongue is dampening the reed, so no sound yet.
- Release the tongue. The reed vibrates and the sound starts.
Starting with your tongue on the reed lets you build up air pressure before the note begins. This prevents that sluggish or fuzzy start where the sound kind of grows in from nothing. The note just starts, immediately and cleanly.
Practice this on just the mouthpiece and barrel. The goal is a clear, steady, sustained tone. With a tuner, you should land somewhere around a concert F sharp. The most important thing is that the tone is steady from beginning to end, not that it is perfectly in tune just yet.
Tonguing and Articulation
Once you have a steady sound, it is time to add the tongue. The tip of your tongue touches the tip of the reed to briefly stop the vibrations, then releases to start them again. This is how you create separate notes.
The key mistake beginners make is letting the air fluctuate along with the tongue. If you say 'tu tu tu' out loud, you will notice your air pulses with each syllable. On the clarinet, you want the air to stay completely steady and continuous while only the very tip of the tongue moves. Think of the tongue as just briefly dampening the reed vibrations (and pausing the sound) without the air support changing at all.
Practice this on the mouthpiece and barrel. Start with a long sustained tone, then begin gently touching the tongue to the reed while keeping that steady air going the whole time. If the tone quality changes when you add the tongue, it usually means the jaw is tightening, the middle and/or back of the tongue is moving out of position, or the air is pulling back. Keep everything steady and let just the tongue tip do the work.
6. Hand Position and Holding the Clarinet
Good hand position is one of those things that seems boring at first but matters enormously. The habits you build right now will either serve you for years or slow you down for years. Let's build the right habits.
The Natural Hand Position
My favorite way to find good hand position is this: shake your hand out at your side. Let it be completely relaxed and natural. Notice the shape your fingers fall into. There is a gentle, relaxed curve. That is the position you want to bring to the clarinet.
Bring the clarinet to that natural hand position, not the other way around. Do not contort your hand to reach the instrument. Let the instrument come to your hand.
Left Hand (Upper Joint)
- Left thumb: Covers the hole on the back of the upper joint and operates the register key above it.
- Left index, middle, and ring fingers: Cover the three tone holes on the upper joint.
- Left pinky: Operates the keys on the side of the lower joint.
Right Hand (Lower Joint)
- Right thumb: Rests under the thumb rest on the back of the lower joint.
- Right index, middle, and ring fingers: Cover the three tone holes on the lower joint.
- Right pinky: Operates the small keys at the bottom of the lower joint.
Covering the Holes
The single most important thing about finger technique is making sure you fully cover the holes every time. The tone holes are big, and covering them completely is one of the trickiest aspects of the clarinet. Use the fleshy pad of your finger, aiming to get the basically the center of your fingerprint in the center of the holes.
A great exercise before you even try to play is to just hold the clarinet and feel each hole with your fingers. Massage them a little. Feel what it is like when your finger is truly sealing a hole versus just touching it. That feeling is what you are always aiming for. You don't have to squeeze hard, you just need to really precisely land in the holes.
Keep your fingers close to the keys. The less distance your fingers have to travel, the faster and more accurate you will be. Flying fingers create squeaking problems and slow you down.
7. How to Read Music: Rhythm, Notes, and Style
Just like playing the clarinet, reading music comes down to just a few fundamentals: rhythm, notes, and style.
Rhythm: The Most Important
Rhythm is the most important element of music, full stop. Without a steady beat, nothing else matters. The notes can be right, the sound can be good, but if the rhythm is not locked in, it does not work.
The key to good rhythm is internalizing a steady pulse and counting. In 4/4 time, there are four quarter notes per measure. Quarter notes get one beat each. Half notes last two beats. Eighth notes are two per beat and are counted '1 & 2 & 3 & 4 &.' Triplets are counted 'one trip-let two trip-let three trip-let' and so on.
Do not just play through your music thinking about the note lengths. Think about where each note falls in relation to the steady beat. Tap your foot. Count out loud. Use a metronome. These are not suggestions. They are essential habits that will define your rhythm for your entire musical life.
Notes: Reading the Staff
The clarinet reads in treble clef. The lines of the staff from bottom to top spell out Every Good Boy Does Fine (E, G, B, D, F). The spaces from bottom to top spell out FACE (F, A, C, E). The treble clef circles around the G line, which is why it is sometimes called the G clef.
As notes go higher on the staff, the pitch goes up. As they go lower on the staff, the pitch goes down. Each line or space moves through the musical alphabet (A-G), forwards going up and backwards going down. Notes on ledger lines (the little lines added above or below the staff) continue the alphabet pattern in either direction.
A fingering chart is one of the most useful tools you can have. It shows a diagram of the clarinet and tells you exactly which holes and keys to cover for each note. Search for a Bb clarinet fingering chart and keep one on your music stand. There is no shame in referencing it. Even experienced players do.
Style: Making Music Sound Like Music
Style is the catch-all category that includes dynamics (how loud or soft you play), articulation (how you tongue the notes and shape them), tempo (the speed of the music), and the overall character or mood. This is the difference between just playing the right notes and making the music actually sound like music.
Do not wait until everything else is perfect before you pay attention to style. Look at your music holistically. Notice the dynamics. Notice the slurs and staccatos. Think about what mood the piece is trying to create. Ask yourself why a crescendo is there, not just that it is there. That curiosity is what transforms technically correct playing into musical performance.
8. Playing Your First Song
Once you can make a steady sound, use the sound preparation process, and get some notes out, it is time to play music. And for a first song, it is hard to beat Hot Cross Buns.
Hot Cross Buns uses only three notes: E, D, and C on the clarinet (these are your first finger, two fingers, and three fingers all with the thumb down). The rhythm involves quarter notes, half notes, and eighth notes, which gives you a chance to practice everything we covered in the rhythm section above.
Here is how to approach it:
- Find the steady beat first. Count one two three four before you play anything.
- Identify the rhythm of each measure before you try to play the notes.
- Add the notes slowly, making sure each one has a clear and steady sound.
- Play the whole song with a steady beat, not stopping to fix mistakes but working through them.
When you can play Hot Cross Buns with a steady beat, a clear sound, and the right articulation, you are officially playing the clarinet. Congratulations! The foundation you built by taking your time through air, embouchure, and tongue position is already making you sound better than most beginners who just jump in and try to play notes.
9. The 3 Step Warm-Up: The Secret to Long-Term Progress
Here is something that might surprise you: the things professionals work on every single practice session are the same three things you need to be working on right now. They are just doing them at a higher level. Those three things are the 3 Step Warm-Up.
The whole point of warm-ups is not just to get ready to play for the day. The warm-up IS the training. This is where you build the fundamentals. And those fundamentals are what make everything else easier.
Step 1: Long Tones (Sound Quality)
Long tones are exactly what they sound like: you hold a note for a long time and listen carefully to the sound. This is the most important thing you can do in any practice session.
The goal is to produce the best possible sound on each note and to find the smoothest possible transition to the next note. No time pressure. No rush to move on. Just listen, adjust, and hold it steady. Start on just five notes of a scale. Move slowly. Think about the start of the note, the sustain, and the transition.
I have been playing for over twenty years. I still do long tones every single time I practice. There is no skill ceiling on this exercise.
Step 2: Technique (Finger Motion)
Technique exercises are where you train your fingers to move cleanly, precisely, and in time. Usually these are some kind of scale or scale pattern exercise, but anything where you focus on your finger motion can be a technique exercise.
The goal here is not speed. The goal is accuracy and coordination. Slow down more than you think you need to. Keep the fingers close to the keys. Make sure every note lands exactly in time. Do these all slurred so that your attention is fully on the finger motion and not split between fingers and tongue.
A great technique routine starts with just a one or two octave C major scale. Then you can add more keys gradually as you get comfortable.
Step 3: Articulation (Tongue Motion)
Articulation exercises add the tongue back into the mix. The goal is to make sure your tongue motion does not disrupt the air or the sound quality. The tongue should briefly dampen the reed vibrations, nothing more.
A great articulation exercise: start on a long tone to get your best sound going, then begin gently tonguing. The sound should stay the same except for the brief separations. If the sound quality gets thin or choppy when you add the tongue, something is changing in the air or embouchure. Fix the long tone and try again.
These three steps build on each other. Long tones establish the sound. Technique adds the fingers while maintaining that sound. Articulation adds the tongue while maintaining both. Each step is a layer on top of the previous one.
A Simple Practice Template (25 to 30 Minutes)
- 3 to 5 minutes: Long tones, focusing entirely on sound quality.
- 5 minutes: Scales or exercises, focusing on precise and relaxed finger motion.
- 3 to 5 minutes: Articulation exercises, focusing on steady air with clean tongue motion.
- 10 to 15 minutes: Work your music or the specific hard spots in it.
- 5 minutes: Play something just for fun, or run through a piece or section as if you are performing.
10. Squeaking, High Notes, and Common Problems
Let's talk about the problems that come up for almost every clarinet player and exactly what to do about them.
Why You Are Squeaking
Almost always, the cause of squeaking is finger coverage. Before you blame the reed, the embouchure, or anything else, check your fingers. Are all the holes fully sealed? Even a tiny leak will cause a squeak.
The most common spots for finger coverage issues are crossing the break (going from the A to the B from the upper to lower joints) and any passage involving the pinky keys. Keep your fingers close to the keys and make sure they are landing in the center of each hole with the fleshy pad, not the very tip.
A good diagnostic: find the note where you squeak. Play just that note, starting on it fresh, and check your fingers carefully. If the note comes out clean when you start on it, the issue is the finger coordination during the transition. If it still squeaks when you start on it cleanly, then look at other factors like the embouchure, tongue position, etc.
Why the High Notes Are Not Coming Out
Getting the high notes out, especially up to and above high C, is one of the most common frustrations for beginner and intermediate players. Here are the four things to check:
- Reed strength: If you are on a strength 2 reed with a standard student mouthpiece, it is probably too soft to vibrate fast enough for the upper register. A strength 3 is usually sufficient. Moving to a harder reed does not automatically fix the problem, but if you are too soft, it will definitely cause one.
- Finger coverage: As you work up to the higher notes, it is easy to get tense and accidentally lift fingers or bump side keys. Play in front of a mirror and make sure all the holes are fully covered even as you reach for those upper notes.
- Embouchure: Do not bite. This is the most common mistake. As the notes get higher, the instinct is to squeeze harder with the jaw. That actually pinches off the reed vibrations and prevents the high notes from coming out. Instead, keep firm corners, a flat chin, and let the jaw stay open. The embouchure should be firm to the touch but not firm against the reed.
- Air: This is almost always the real culprit. High notes require faster, more focused air. Think narrow, fast, energized air aimed straight in front of you like hitting a bullseye. Not more air, but faster air.
The Most Common Beginner Mistakes
- Biting the mouthpiece: Creates a thin, pinched sound and causes embouchure fatigue. Use corner pressure, not jaw pressure.
- Not enough mouthpiece: It is weird to put the reed and mouthpiece in your mouth, but if there isn't enough reed to vibrate you will never get a full resonant sound.
- Not covering the holes fully: The number one cause of squeaking. Keep fingers relaxed and centered on the holes.
- Flying fingers: Fingers that travel too far away from the keys slow you down and cause coordination problems. Keep them close.
- Letting the air fluctuate with the tongue: Keep the air steady and continuous at all times. The tongue just briefly dampens the reed vibrations.
- Skipping the warm-up: The warm-up is the training. Do not skip it.
- Practicing faster than you can play accurately: Speed is not the goal of practice. Accuracy is. Slow is smooth. Smooth is fast.
- Ignoring the reed: Each reed in a box is different. Rotate through at least four reeds. Replace chipped or cracked reeds. The only way to have good reeds is to go through more reeds.
11. Year by Year: What to Focus On as You Grow
Learning the clarinet is a long journey, and knowing what to focus on at each stage makes a huge difference. Here is a quick roadmap.
First Year
This is the experimentation stage. Focus on getting a good sound on the mouthpiece and barrel before adding the full instrument. Make sure your top teeth are on the mouthpiece (not your lip). Get comfortable with basic fingerings. Start reading music. And really make sure your tongue is actually touching the reed to articulate notes. Many beginners unknowingly tongue from the throat for years without realizing the tongue should be touching the tip of the reed.
Second Year
This is where you start building consistency. The biggest challenge of this year is usually crossing the break: the transition from the lower register to the upper register. The secret to crossing the break is to not make it a big deal. Keep the air steady, keep the fingers relaxed and minimal in their motion, and just go. The more you tense up about crossing the break, the harder it gets. Then start learning the chromatic scale to become familiar with all the notes on the instrument.
Third Year
The higher notes are your focus this year. Keep the air strong and focused. Keep the embouchure firm but open. The high notes do not have to be hard if the air is doing its job. If you haven't moved up to a harder reed this is where you may start running into issues. Also: find a local repair person and start taking your clarinet in for regular maintenance. Small issues caught early are much cheaper than big problems ignored.
Fourth-Fifth Year and Beyond
This is the intermediate stage. Learn all twelve major scales, two octaves each, and memorize them. Really understand what warm-ups are for: they are not just getting ready to play, they are building your fundamentals. Go slow enough that you can do things accurately. Don't compare yourself to other players. The only comparison that matters is you today versus you yesterday. The secret to playing fast is relaxation. You can never force yourself to play faster. You can only relax yourself to play faster.
12. Free Resources to Continue Your Clarinet Journey
You do not have to figure this out alone. Here are the best resources I offer to help you keep growing.
Right Here at QuickStart Clarinet
- Free Members Area: Go to www.quickstartclarinet.com/getstarted and create a free login to access my best handouts, downloads, fingering charts, and warm-up resources. There is over a year's worth of material in there, all completely free.
- QuickStart Clarinet YouTube Channel: Hundreds of videos covering every fundamental topic you can think of, from long tones and articulation to crossing the break, reed selection, high notes, and beyond. Subscribe and turn on notifications so you never miss a new one.
- The Next Generation Clarinet Method Book: This is my method book and I genuinely believe it is one of the best tools you can have as a clarinet player at any level. The first section covers all the fundamentals of playing properly, including how to apply everything we covered in this guide. Then it moves into warm-ups, exercises, and music to implement it all. You can find it at www.quickstartclarinet.com/nextgenmethod.
- Mini Strategy Session: Meet with me directly for a quick look at where your playing is and what the most effective next step would be for your specific situation at https://calendly.com/quickstartclarinet/mini-strategy-session.
A Few Closing Thoughts
Playing the clarinet is one of the most rewarding things you can choose to do. The foundation you are building right now, however slowly and imperfectly, is the same foundation that professionals still come back to in every practice session. Long tones. Scales. Articulation. Slow down. Cover the holes. Support the air.
There is no shortcut to playing well, but there is a right path. You are on it. Keep going.
Happy practicing!
All links to Sweetwater products are affiliate links that help support my work at no extra cost to you!
About Me
Hi, my name is Josh Goo! I have over a decade of experience teaching the clarinet at universities, online, privately, and more. Additionally, I've maintained an active performance schedule playing with symphonies, bands, chamber groups, and as a soloist.
After years of gaining all of this experience, and studying with some of the greatest clarinet pedagogues in the world at places like Northwestern and the Aspen Summer Music Festival, I am so excited to be sharing it all with you in simple and straight-forward ways that will bring less frustration and more joy to your clarinet journey!
Check out some of my favorite resources to make your clarinet playing easier and more enjoyable:
All-In-One Method Program for Self-Study
https://www.quickstartclarinet.com/nextgenmethod
Go Deep and Become a Confident Clarinetist
https://www.quickstartclarinet.com/confidentclarinetistsclub
Get My Best Free Resources in One Place
https://www.quickstartclarinet.com/getstarted
Find tips on just about any clarinet, music, or practice topic by searching YouTube for "QuickStart Clarinet [insert your question]"