How to Assemble Your Clarinet
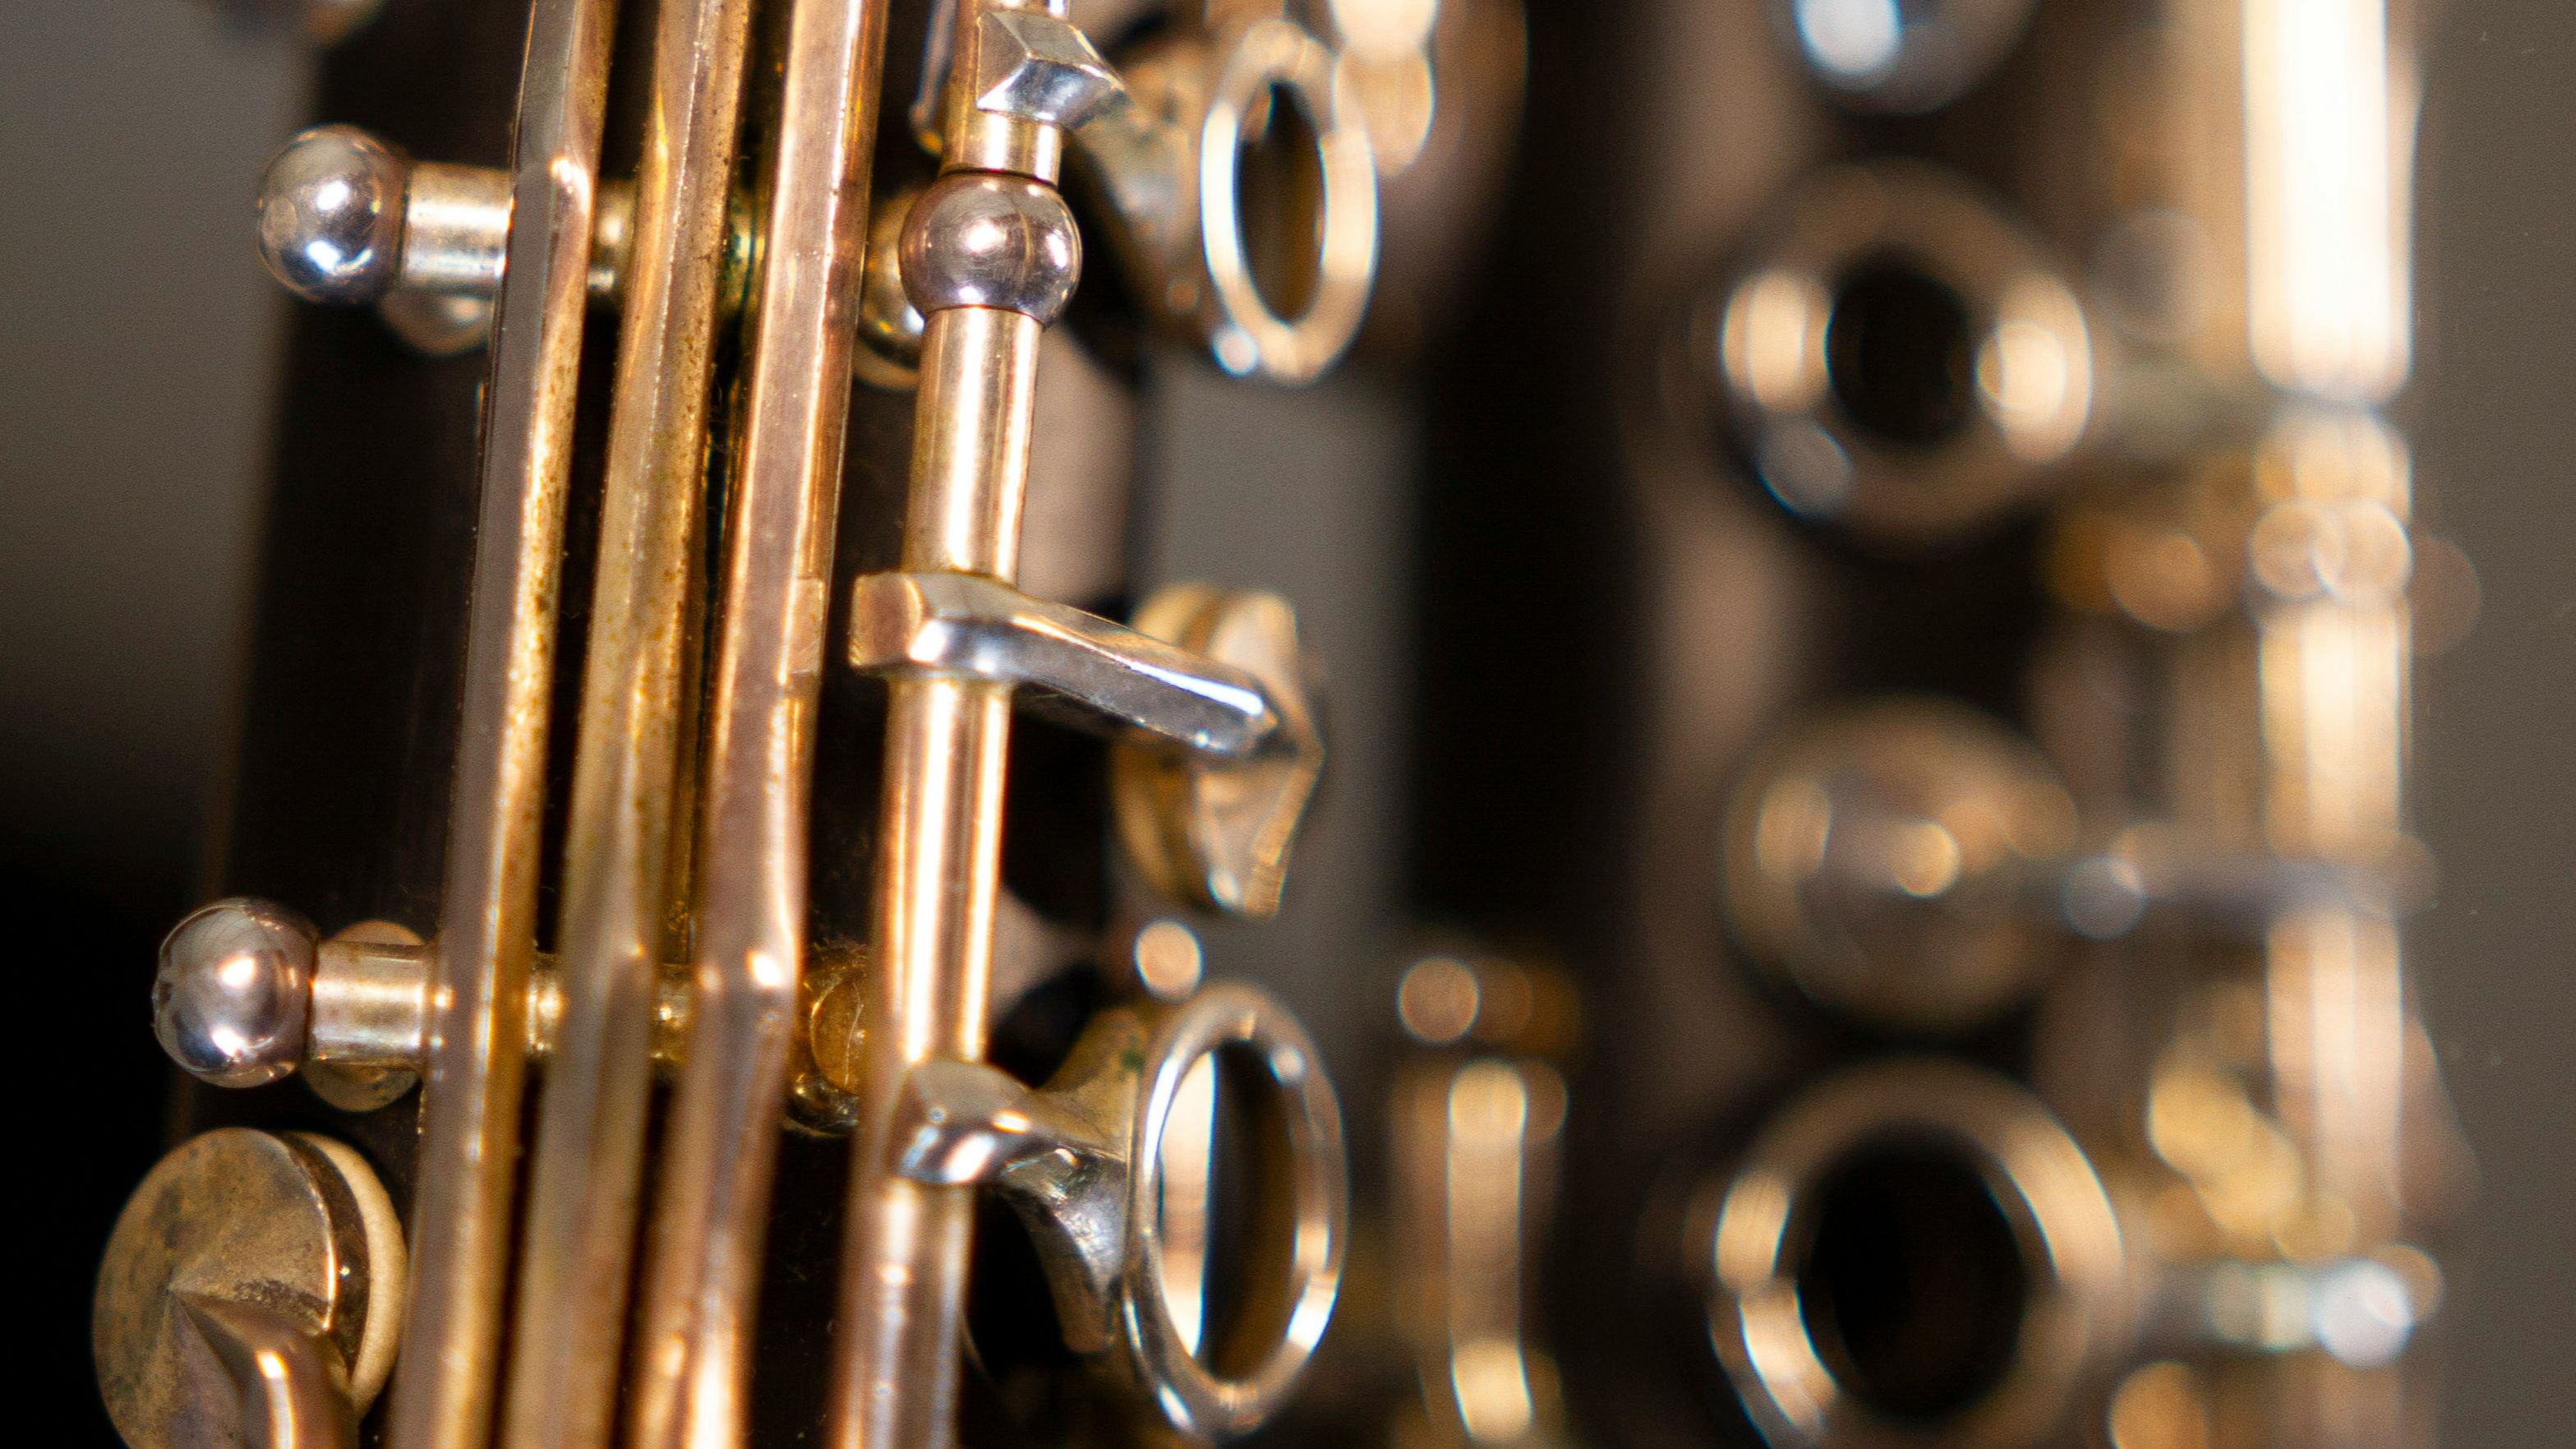
Photo by Eleonora Paolino on Unsplash
So you've got your clarinet. Now what? Before you can play a single note, you have to put the thing together, and if you've never done it before, it can feel a little intimidating with all those keys and joints staring back at you.
The good news is that assembling a clarinet is actually pretty straightforward once you know what you're looking at and in what order everything goes. By the end of this post, you'll be able to put your clarinet together confidently and have it ready to play.
1. The Parts of the Clarinet
When you open your clarinet case, you'll find five main pieces. Here's what they are and where they go:
The mouthpiece and ligature sit at the very top of the instrument. They're often stored together in the case. The mouthpiece is what you blow into, and the ligature is the small metal or plastic piece that holds the reed onto the mouthpiece.
The barrel is a short cylinder that connects to the mouthpiece and leads into the body of the instrument.
The upper joint is where your left hand goes. A good way to tell it apart from the lower joint is that it has small trill keys and side keys along the side.
The lower joint is where your right hand goes. It has larger lever-style keys and big pads toward the bottom.
The bell is the flared piece at the very bottom. It looks like a bell, it's called a bell, very easy to remember.
2. How to Use Cork Grease
Before you start putting anything together, you'll want to get out your cork grease. Each joint of the clarinet has cork around it, and greasing that cork makes the joints slide together much more easily, especially when an instrument is brand new.
The most common beginner mistake here is using way too much cork grease. You really only need a tiny amount, about as much as you'd put on your lips from a chapstick. Apply a little bit all the way around the cork, and then rub it in with your fingers. That's the step a lot of people skip: rubbing it in. It helps work the grease into the cork and removes the excess.
Why does the excess matter? Too much cork grease left sitting on the surface can actually damage the corks over time. A little goes a long way.
3. Putting the Clarinet Together
I like to assemble from the top down, starting at the mouthpiece and working toward the bell. Some people go bottom up and that's fine too. Either approach works perfectly well.
Make sure you have some clear space to work. You don't want to be balancing pieces awkwardly on your lap, because dropping any of these joints is no fun.
Mouthpiece into the Barrel
This is the easiest step. One end of the mouthpiece clearly fits into the barrel and the other end doesn't. Slide it in until it feels secure, and avoid squeezing or bending your ligature while you do it.
Barrel into the Upper Joint
This is where things get a bit more involved, because now there are keys to think about. The goal is to avoid putting pressure on any of the keys or side keys as you connect the pieces.
My recommendation is to hold the upper joint the way you'd actually hold the clarinet when playing, with your fingers resting naturally on the main tone holes. That way you're not accidentally squeezing any side keys while you push the pieces together.
A little twisting motion as you slide pieces together makes it easier. That same twist can also help if pieces ever get stuck and you need to pull them apart.
Upper Joint to Lower Joint
This is the trickiest step, and I'll cover it in more detail in the next section because of the bridge key. For now just know: take your time here, and don't force it.
Bell onto the Lower Joint
The bell goes on last. Hold the lower joint comfortably, slide the bell on with a little twist, and you're done.
4. The Bridge Key: The Most Important Thing to Watch
The bridge key is a small mechanism that connects the upper joint and the lower joint. There's one on each joint, and they need to line up correctly when the instrument is assembled. If they get smashed into each other during assembly, you can bend them, which causes real mechanical problems.
Bending the bridge key is probably the most common repair issue I see in beginners. Here's how to avoid it:
When you're connecting the upper joint to the lower joint, press down the ring key on the upper joint. When you press that ring down, it lifts the upper joint's bridge key out of the way.
On the lower joint side, you actually don't press anything. Instead, hold the lower joint in a spot where your hand isn't on any of the keys. That keeps the lower joint's bridge key in its natural position.
With the upper bridge key lifted and the lower bridge key in place, you can slide the joints together and watch them align. Most bridge keys line up pretty directly. If yours has a small wing on it that makes alignment a little more confusing, look for the posts instead. The posts are the small metal pillars that the circular ring keys pivot on. Line those up and you'll be in good shape.
5. Putting on the Reed
Once the clarinet is assembled, the last thing to do before playing is put on the reed. Here's the process:
Step One: Wet the Reed
Reeds need to be wet before they'll vibrate and produce sound. The easiest way to do this is to just put the reed in your mouth while you're assembling the rest of the instrument. Wet the thin tip end, and also wet the thicker butt end. Getting both ends wet is important. About 30 seconds in your mouth is usually enough.
Step Two: Place the Reed on the Mouthpiece
Slide the ligature off the mouthpiece first. Then place the flat side of the reed against the flat side of the mouthpiece. The shape of the reed and the shape of the mouthpiece should line up fairly naturally. You want them roughly in alignment.
One handy trick: if a reed feels too hard and resistant, you can slide it down very slightly on the mouthpiece. If it feels too soft and buzzy, slide it up a tiny bit. But for most situations, alignment with the mouthpiece tip is the right starting point.
Step Three: Slide on the Ligature
This is the step where it's easiest to accidentally chip the reed, so slow down here. Carefully slide the ligature over the reed and onto the mouthpiece. The ligature should sit below the cut of the reed, not above it. Some reeds have a clearer line at this cut than others, but as a general rule, you want the ligature below where the bark of the reed stops.
Tighten the ligature just enough that the reed isn't wiggling around loosely. You don't need to crank it down. And when you're tightening, the screws should be on the right side when you're looking at the face of the reed.
With that, your clarinet is fully assembled and ready to go. Up next, we'll get into how to actually make your first sound.
Reading about assembly is one thing, but watching someone do it in real time makes everything click much faster. I walk through every step of this process in detail in my "The Definitive How to Play Clarinet Guide for Beginners with Timestamps!" YouTube video, including a close-up of the bridge key alignment and how to avoid bending it. See It in Action
Disclosure: Some links in this post are affiliate links. If you make a purchase through them, I may earn a small commission at no extra cost to you. I only recommend products I genuinely trust.